Something I thought I’d share here was my experience in making a custom hockey skate boot punch... for cheap. I know other versions exist and people have made attachments for retail sale which are quite costly. I wanted to come up with a method that was non permanent to expensive tools or parts, was affordable, and of course worked.
Like many I have accessory navicular bones (extra bone) on both feet just diagonally down from my ankle bones. If anyone has tried skating with regular skates you will quickly find out that these bones rub and damage your skate padding and eventually wear down into the shell. Not only do your feet kill, but heal time can be super slow.
Okay, enough about that: here is what you need to buy to make your own punch!
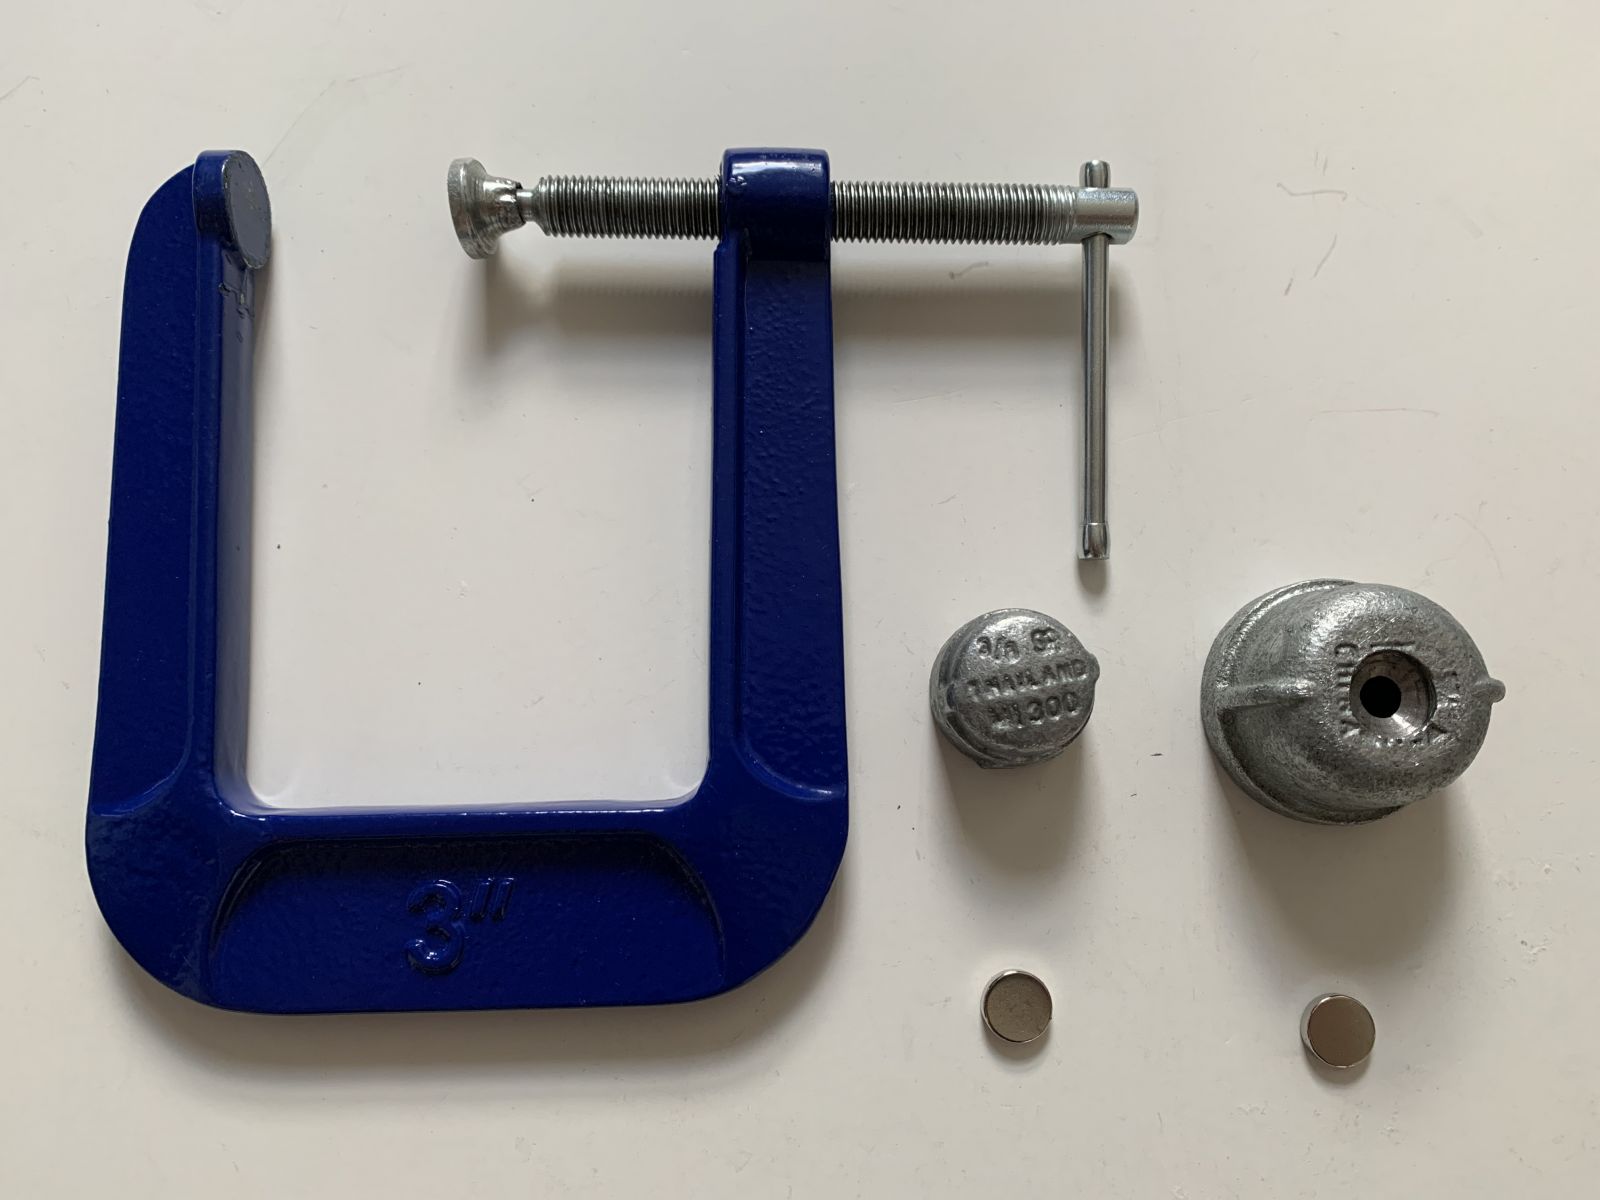
1) One deep set “C” clamp. I went with an Irwin 3” deep style C clamp at my local hardware store. Got it for $9.99. The keys here are making sure the depth will accommodate your skate boot far enough to punch the area you need. And second is that the clamp is fully metal and will allow magnets to stick anywhere.
2) Two Rare Earth magnets. I went with 1/2” diameter by 1/8” depth. Got both from Lee Valley Tools for $4
3) Two different sized threaded pipe cap ends. These are also from the local hardware store and you can find these for various uses. I went with the cheapest price and again magnetic metal. The key here was finding the outside diameter of the small cap and the inside diameter of the large cap so that the small one nests inside the large one. They were $6 total.
4) The misc tools I had at home but if you don’t have would need to buy or borrow are: power drill and bits, hot glue/epoxy/adhesive.
Here is the process:
Using the clamp I laid down the large cap with the open end facing down, clamped the edges with the clamp laying on its side. I then placed one of the magnets on the top of the cap and drew a circle around it with a pencil. Remove the magnet, find a drill bit to match the diameter and drill out. For me it was 1/2”. The clamp is to give you a handle when drilling. I went 1/8” deep to match the magnet depth so it sits flush. Then drill a smaller hole in the middle of the cap so you can pop the magnet out from the inside. This also makes it possible to use your magnet for other things.

For the smaller cap, flip it so the cap is down and the opening is up. Fill the space with your adhesive or epoxy (I just used a hot glue gun) until you have approx 1/8” depth unfilled remaining. Let that dry. Then add a little more and press your magnet on so it is flush with the edges and let that dry. If you don’t want to fix the magnet you can epoxy/glue a small metal circle (washer or coin) so that the magnet stays removable if you prefer.
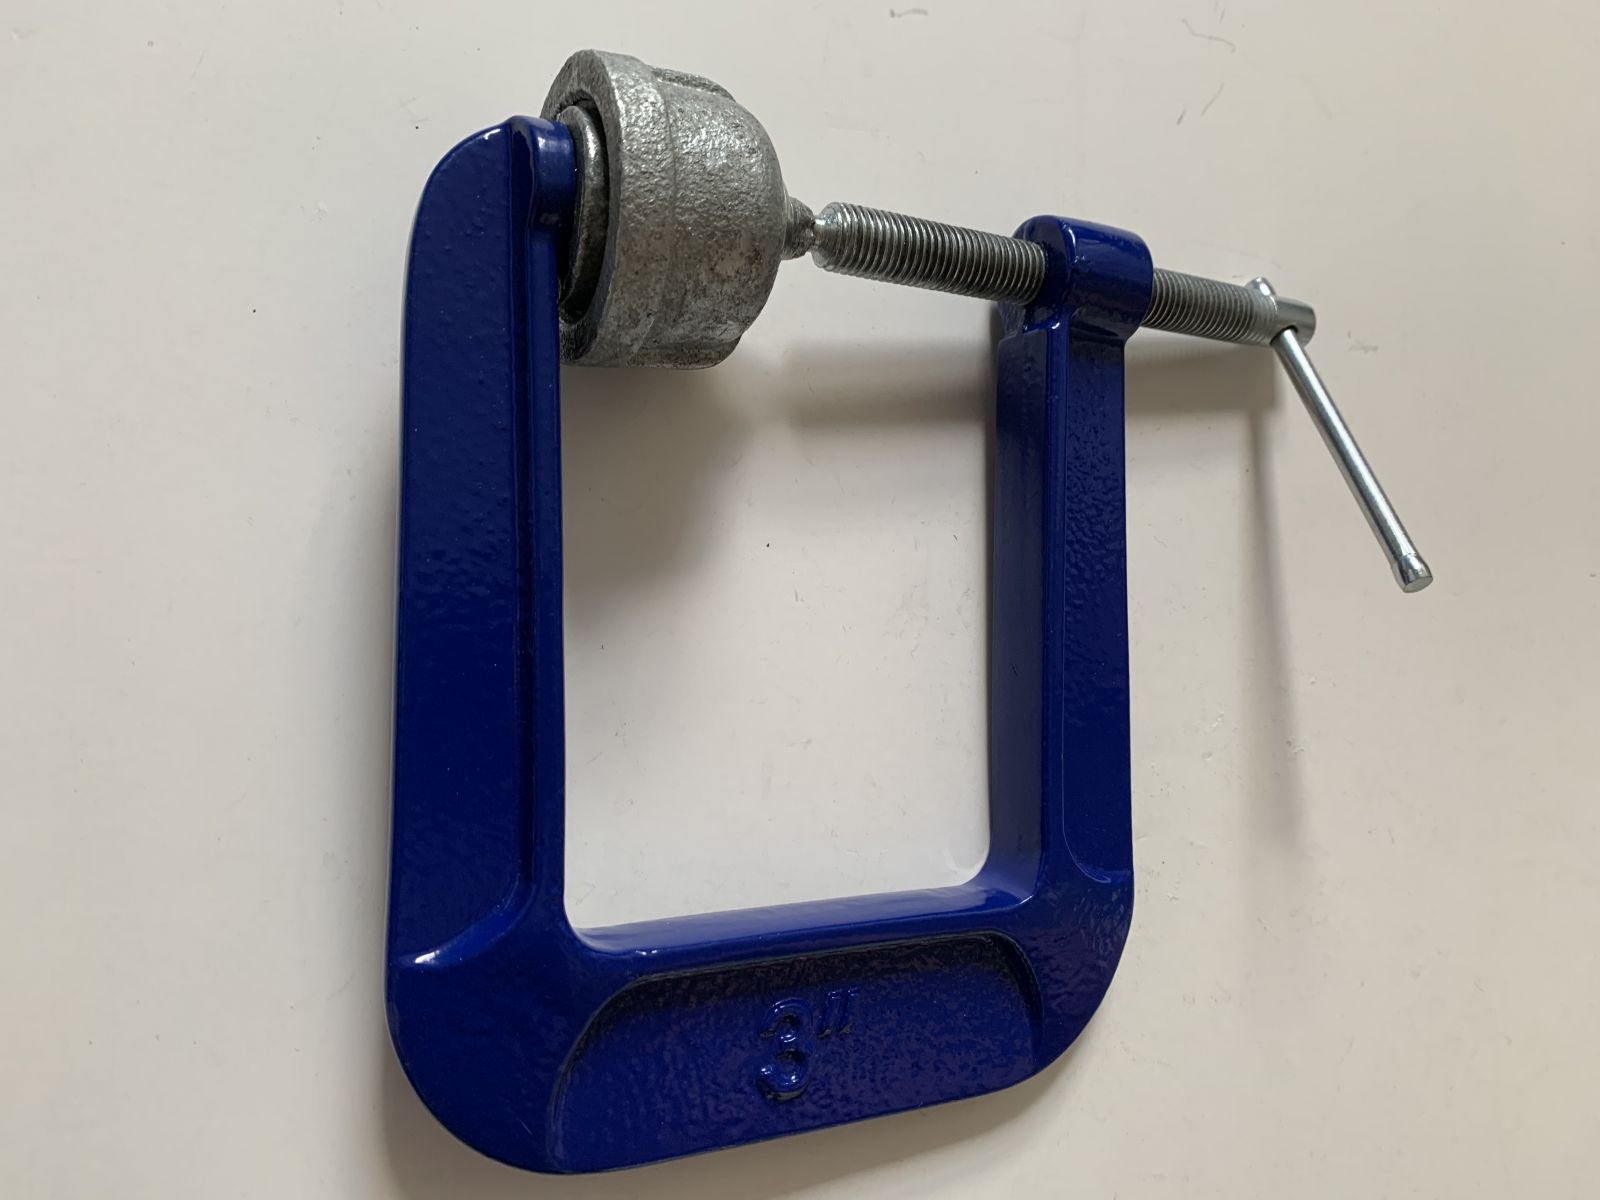
That’s it. Take the first magnet and slide it into the top of the large cap and attach that to the threaded clamp end. Take the small cap and attach that to the stationary end. Now slide the clamp in your boot and using the crank arm tighten it until you have punched the depth you need. The crank arm on the outside of the boot with the larger cup will accommodate the smaller cup pressing the boot material outward and make the perfect punch out.
I have punched both my hockey skates and Roller Boots with perfect results.
Hope this helps a DIYer out or save you money if you keep paying someone else to do this with high tech equipment.
Best part is, total cost is under $20.00 and the clamp is not altered or damaged, just the cheap pipe caps.